# SD Card Setup
The Replay loads cores at boot time from an SD card. A class 10 or faster card is recommended, with sizes up to 200GB tested. The card should be formatted with either the FAT32 or exfat file system. As FAT32 has a 4GB file size limitation, the use of exfat is recommended.
Note
The Replay theoretically supports cards up to ~2TB however only cards up to 200GB in size have been tested so far.
If you insert the now blank SD card into the Replay and power on, the Replay will, unsurprisingly, fail to find a valid core and will fall back to the "embedded loader", a small utility core baked into the Replay's Firmware.
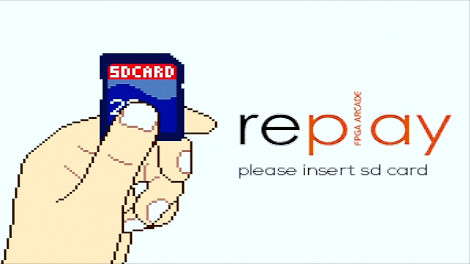
The OSD will also display the text "NO VALID SETUP ON SDCARD!" along with a note it cannot find the "replay.bin" file and to check the "ini" file.
Tip
If you do not see the embedded loader background/OSD and your Replay is connected to a interlaced display rather than Progressive. Press the multi-function button on the rear of the replay to toggle display modes.
By default the Replay looks in the root of the SD card for a "replay.ini" file which contains core specific configuration information. Each core for the Replay ships with a corresponding pre-configured "ini" file. You will generally not need to edit this file with a few exceptions that will be covered below.
Note
A core should always be used with the replay.ini file it shipped with and when updating a core to a new version you should always also update the replay.ini. Failure to do so is the most common reason a core will fail to boot.
# Loader Core
The first core to setup is the "loader" core. This is a small core that enables you to browse the SD card file system and load other cores.
Download the latest version of the loader core from the FPGA Arcade Releases (opens new window) page and unzip the contents into the root of your SD card. Your card should look like this
/
├── background.raw
├── background_rgb.raw
├── replay.ini
├── replay_pal.ini
├── loader.bin
├── loop.pcm
The loader core provides a replay.ini file configured for NTSC and optionally one for PAL users. Either file will generally work with a progressive display. If however you are using a PAL interlaced display then rename replay.ini to replay_ntsc.ini and rename (or copy) replay_pal.ini to replay.ini.
Eject the SD Card from your PC, insert it into the Replay and power on. You should now see the "FPGA Arcade" logo and an OSD that no longer complains about a missing ini file.
Complete coverage of the functionality provided by the OSD is beyond the scope of this guide. For now, know that F12 can be used to toggle the OSD and the left/right cursor keys cycle through available menu pages.
The "Replay Menu" page provides a "Load Target" entry via which you can navigate the file system and load any core on your SD card by selecting its ini file.
Let's get a few more cores installed on the SD card and configured.
# More Cores
Adding cores is simply a matter of downloading the latest zip file for any/all of the cores for the Replay1 (R1) from FPGA Arcade Releases (opens new window) and unzipping each into its own directory on the SD card.
Note
Only download and use cores from the R1/ release directory. Cores for other platforms such as the V4 will not work with your Replay1 device.
Let's add the Acorn Electron and Donkey Kong cores to the SD card. Download the latest zip and extract each to a directory called "acorn_electron" and "donkey_kong". Your sd card should now look like:
/
├── background.raw
├── background_rgb.raw
├── replay.ini
├── replay_pal.ini
├── loader.bin
├── loop.pcm
├── acorn_electron/
│   ├── acorn_electron.bit
│   ├── changelog.md
│   ├── empty.rom
│   ├── readme.md
│   └── replay.ini
└── donkey_kong/
.   ├── dk2_wave2.bin
.   ├── donkey_kong.bit
.   ├── donkey_kong.ini
.   ├── donkey_kong_nodblscan.ini
.   └── README.md
You might think you're all set, just use the "Load Target" menu item from the OSD, navigate into the core's directory and select one of the available ini files and off you go. We're not quite there yet.
# ROMs
Virtually all cores depend on additional files and configuration. This is usually detailed in a README file that accompanies each core.
In the case of the Acorn Electron you need ROM files for the "os.rom" and "basic.rom" and optionally a "plus1.rom" and any cartridge ROMs.
Note
As ROMs are generally copyrighted they cannot legally be distributed with core releases. You will need to obtain a legal copy of any required ROMs yourself.
Where should the ROMs go? That depends on where the core expects them and that is determined by the core's ini file. Open the "acorn_electron/replay.ini" and scroll down to the "[UPLOAD]" section
[UPLOAD]
VERIFY = 1

# Split Basic/OS ROM
# DDR ROM starts at 0x8000 to allow for RAM
ROM = basic.rom, 0x4000, 0x00008000
ROM = os.rom,    0x4000, 0x0000C000
In this case the basic and os rom do not have any path prefix, so the core expects them to be in the same directory as the ini file i.e
├── acorn_electron/
│   ├── acorn_electron.bit
│   ├── basic.rom
│   ├── changelog.md
│   ├── empty.rom
│   ├── os.rom
│   ├── readme.md
│   └── replay.ini
As the Replay does not impose any particular directory structure on you. You may choose to keep your ROM files in a roms/ sub-directory. To do so, edit the ini file and change the rom location to include the appropriate path.
ROM = roms/basic.rom, 0x4000, 0x00008000
ROM = roms/os.rom,    0x4000, 0x0000C000
That's really all there is to setting up your SD card for use with the Replay.
Note
Some cores may require additional changes to the ini file to set the default display mode (progressive/interfaces) and whether a scan doubler is used. Be sure to check the README file that accompanies each core for details.
